You are ready to call it a night, but as you press the button to close your garage, the door stops, reverses, and the opener lights start flashing at you. It's a frustrating moment that leaves your home vulnerable and your schedule stalled. Most of the time, this isn't a total mechanical failure. Instead, it's usually a simple communication breakdown that you can solve with basic LiftMaster safety sensor troubleshooting. We know that a garage door stuck open feels like a major security risk, and nobody wants to face a hefty repair bill for a problem that might just be a bit of dust or a bumped bracket.
This guide will help you diagnose the issue immediately by teaching you exactly what those blinking LED lights are trying to tell you. We will walk through how to clean, align, and test your sensors to get your door moving safely again. You'll gain the confidence to handle these simple fixes yourself and learn how to identify the specific signs that mean it's actually time to call in a professional team. Let's get your garage door back on track and your home secured.
Key Takeaways
- Decode your opener's signals by learning what the 10-flash light sequence means for your "Protector System."
- Save time with DIY steps for cleaning lenses and adjusting sensor brackets to fix simple alignment errors.
- Perform effective LiftMaster safety sensor troubleshooting by checking for common wiring faults like pinched lines or corroded connectors.
- Identify the specific signs of environmental damage from salt air and humidity that signal it's time for a professional replacement.
- Gain peace of mind by knowing when to call a local specialist who offers honest, standardized pricing for complex electronic repairs.
Identifying LiftMaster Safety Sensor Symptoms and LED Codes
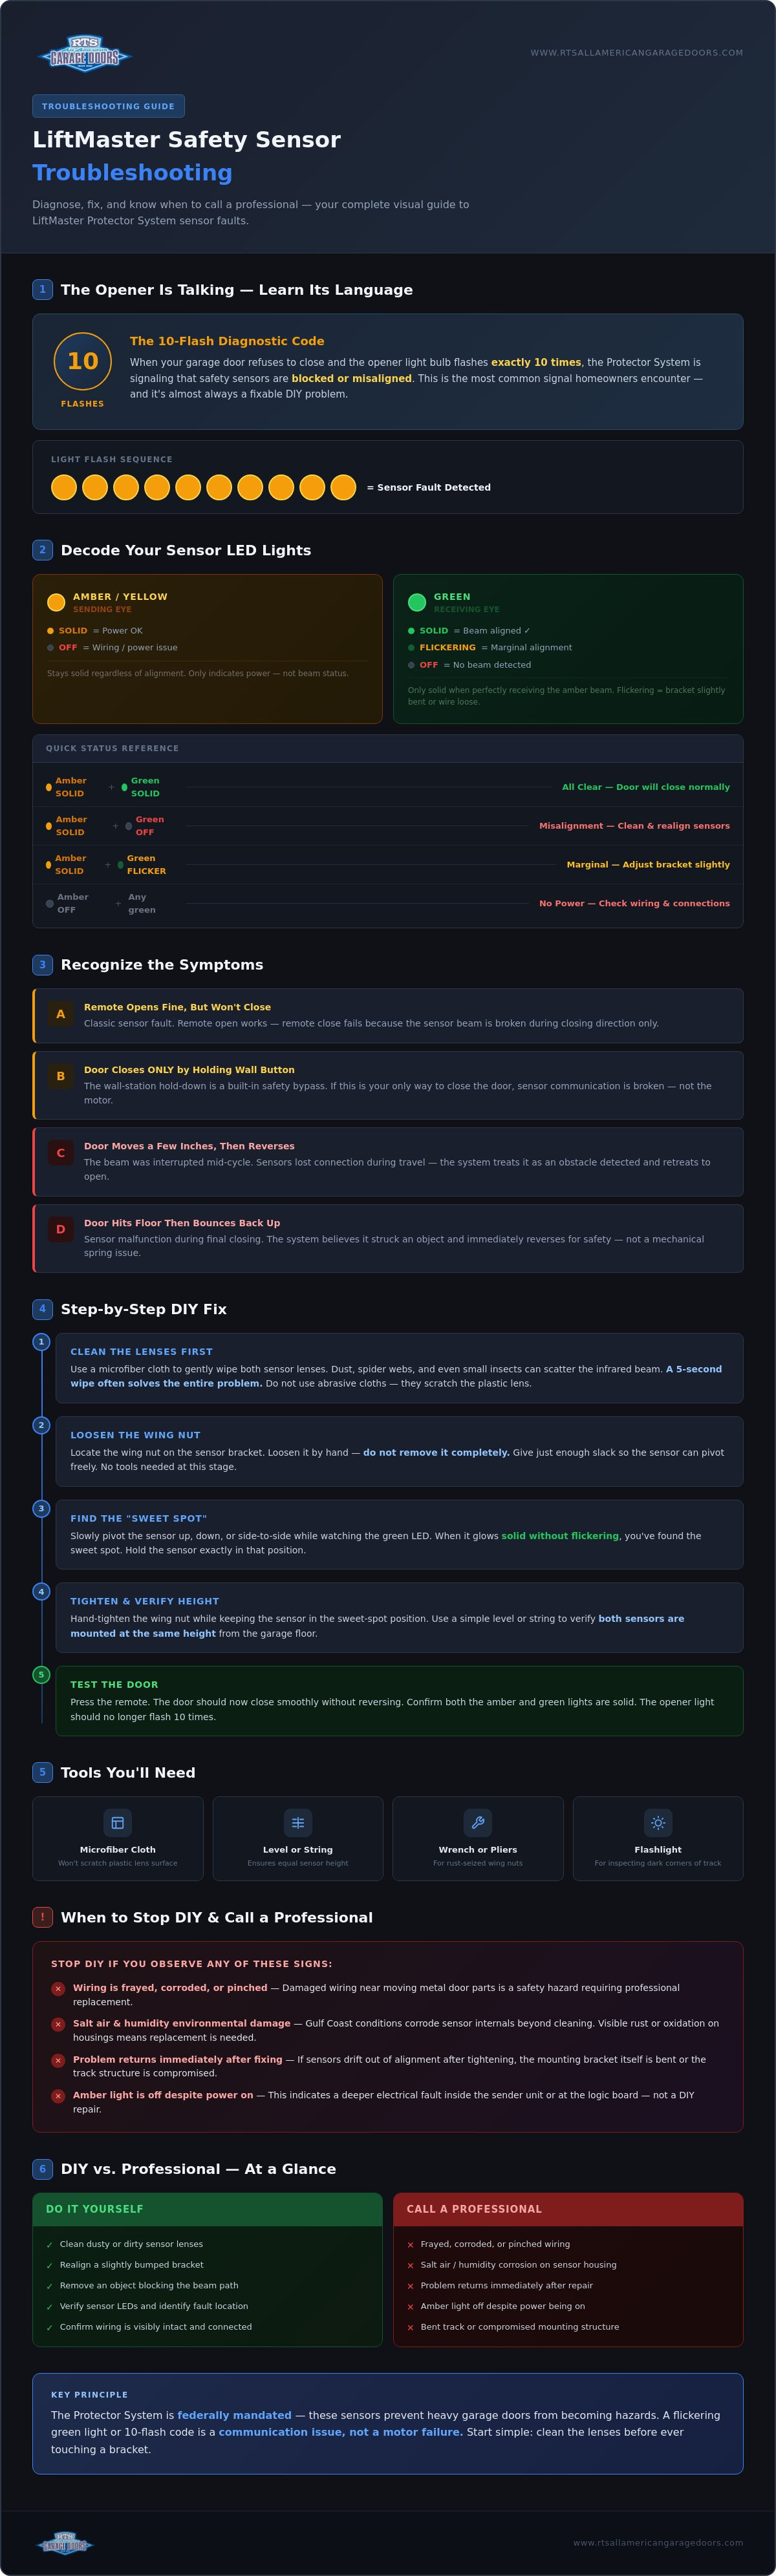
Your LiftMaster garage door opener is equipped with what is known as the Protector System. This isn't just a fancy accessory; it's a critical safety feature designed to stop the door from closing on people, pets, or vehicles. When you start your LiftMaster safety sensor troubleshooting, the first thing you should look at is the main opener motor unit. If the door refuses to close and the main light bulb flashes exactly 10 times, the system is telling you that the safety sensors are either blocked or misaligned. This diagnostic code is the most common signal homeowners encounter.
Modern garage door opener safety features are built to be sensitive. You might notice the door begins to travel downward but then reverses immediately, returning to the fully open position. In some cases, the door might even hit the floor and pop back up like it struck an object. These behaviors aren't random glitches. They are specific responses to a break in the invisible infrared beam that travels between the two sensor units located near the bottom of your door tracks. If one sensor LED is solid green while the other is off or flickering, you've narrowed down the location of the fault.
Decoding the Sending and Receiving Eye Lights
Every LiftMaster sensor pair has a "Sending Eye" and a "Receiving Eye." You can tell them apart by the color of the small LED light on the side of the housing. The amber or yellow light belongs to the Sending Eye. This light should stay solid regardless of whether the sensors are aligned; it only indicates that the unit has power. If this light is off, you likely have a power supply or wiring issue. The green light is the Receiving Eye. It will only stay solid when it is perfectly "seeing" the beam from the amber light. If the green light is flickering or completely dark, the sensors aren't communicating. A flickering green light often means the alignment is marginal, perhaps because a bracket is slightly bent or a wire is loose.
Common Symptoms of Sensor Misalignment
Misalignment often manifests in ways that feel like a complete motor failure, but there are telltale signs it's just a sensor issue. One clear symptom is when your remote control works perfectly to open the door but fails to close it. You might also find that you can only get the door to close if you stand at the wall station and hold the button down constantly until the door reaches the floor. This manual override is a safety bypass built into the system. If the door moves just a few inches and then retreats to the open position, it's a classic sign that the beam was interrupted or the sensors lost their connection mid-cycle. Effective LiftMaster safety sensor troubleshooting starts with recognizing these patterns so you don't waste money on parts you don't actually need.
Step-by-Step DIY Sensor Alignment and Cleaning
Once you've identified that the blink code points to a sensor fault, the next step in your LiftMaster safety sensor troubleshooting journey is a physical inspection. Don't jump straight to bending the metal brackets. Many online videos suggest forcing the brackets into place with your hands, but this is a temporary fix that often ignores the real culprit: simple dirt. Dust, spider webs, and even small insects can obstruct the lens enough to scatter the infrared beam. Start by taking a clean, soft cloth and gently wiping the lenses on both the sending and receiving units. You'd be surprised how often a five-second cleaning job solves the entire problem.
These sensors are more than just a convenience. They are mandatory under federal safety regulations established to ensure that heavy garage doors don't become a hazard to your family. If cleaning doesn't restore the solid green light, it's time for a manual alignment. Locate the wing nut on the side of the sensor bracket. Loosen it by hand; you don't need to remove it completely. Give it just enough slack so the sensor can pivot. Slowly move the sensor up, down, or side-to-side while watching the LED. When the green light glows steadily without any flickering, you've found the "sweet spot." Hold the sensor in that exact position and hand-tighten the wing nut back down.
Tools and Materials for a Quick Fix
You don't need an expensive toolbox for this task. Most homeowners can find these items in a kitchen drawer or a basic utility kit:
- Microfiber cloth: This is the best choice for lenses because it won't scratch the plastic surface.
- A simple level or string: Use this to ensure both sensors are mounted at the same height from the garage floor.
- Wrench or pliers: If your garage is older, salt air or humidity might have rusted the wing nuts, making them hard to turn by hand.
The 'Cardboard Test' for Perfect Alignment
After you believe the alignment is correct, you must verify that the system actually works. This is where the cardboard test comes in. Open your garage door fully. Place a small box or a piece of cardboard directly in the path of the sensors. The green LED on the receiving eye should cut out immediately. Try to close the door with your remote; it should refuse to move and the opener lights should flash. Remove the object and verify that the light returns to a solid green. If the door still won't behave after these steps, it might be time to consult a local garage door expert to check for deeper electrical issues or circuit failures.
Troubleshooting Wiring Issues and External Interference
When alignment and cleaning don't restore your system, the problem often lies within the "veins" of the unit. Wiring issues are the most overlooked part of LiftMaster safety sensor troubleshooting, yet they represent a significant portion of system failures. You should start by inspecting the entire length of the bell wire from the sensors up to the motor head. Look closely at the insulated staples used to secure the wire to the walls and ceiling. If a staple was driven too deep during installation, it can pierce the thin insulation and create a silent short circuit that prevents the sensors from communicating with the logic board.
The connection points at the sensor heads themselves are another common failure zone. Check the wire nut connections for any signs of green or white corrosion, which is common in garages with high humidity. You must also verify that the wires are properly seated in the motor unit terminals. Modern LiftMaster openers use quick-connect terminals; ensure the white and white/black wires are pushed firmly into their respective slots. A modern but frustrating source of interference comes from high-output LED light bulbs installed in the opener itself. Some non-shielded LEDs emit radio frequency interference that can actually "blind" the sensor's electronic signature, so try removing the bulbs temporarily to see if the door begins to function.
Solving the Sunlight Interference Problem
Direct sunlight is a powerful source of infrared radiation that can overwhelm the receiving sensor. This typically happens during certain hours of the day when the sun is low on the horizon and shines directly into your garage. To fix this, you can swap the sending and receiving sensors to the opposite sides of the door so the receiving eye is in the shade. If that isn't possible, construct a temporary sun shield using a small piece of PVC pipe or even a dark cardboard tube to create a "snoot" around the lens. This helps the sensor focus on the amber beam rather than the sun's glare.
Locating Wire Breaks and Short Circuits
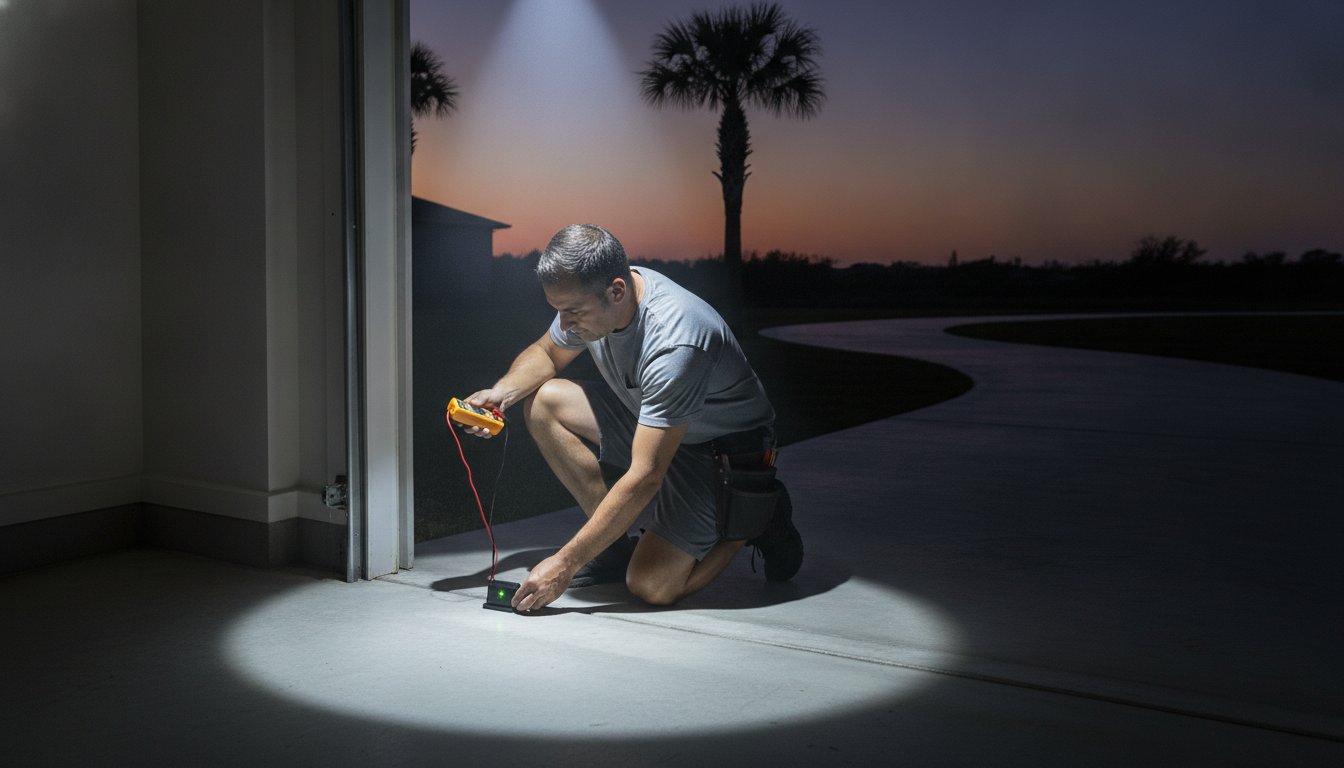
The thin 2-strand bell wire used in these systems is vulnerable to damage from pets, pests, and even accidental bumps from garden tools. Carefully trace the line to find any frayed sections or areas where the wire has been chewed. If you notice black soot or burn marks near the sensor terminals, a power surge may have occurred. These safety mechanisms are strictly governed by CPSC safety standards to ensure reliability. To prove a wire break exists, you can perform a "bench test" by disconnecting the sensors from the wall and connecting them directly to the motor unit terminals with two short, 6-inch pieces of wire. If the lights turn solid, you know the long wire run in your walls needs to be replaced.
Recognizing When Sensors Need Professional Replacement
Your LiftMaster safety sensor troubleshooting might eventually reveal that the hardware has simply reached its limit. While these components are designed for durability, they aren't invincible, especially when facing the harsh environmental conditions found along the coast. If you have cleaned the lenses, checked the alignment, and verified the wiring but the green light still refuses to glow, the internal circuitry has likely failed. Modern LiftMaster systems are sophisticated and require specific 'The Protector System' replacement parts to maintain the safety loop. Attempting to use generic, off-brand sensors can lead to intermittent failures or even damage the opener's logic board.
Sometimes the sensors themselves are functional, but the motor unit's logic board is unable to process their signal. This is a common scenario after a significant power surge or a nearby lightning strike, which are frequent occurrences in our region. If your sensors pass a bench test at the motor but the system still reports a blockage, the board itself is likely the culprit. You should also inspect the sensor housings for physical damage. Cracked plastic housings are a major red flag. Even a hairline fracture allows moisture to seep inside, causing a short circuit that regular troubleshooting cannot fix. In these cases, replacement is the only way to restore the integrity of your garage door system.
The Impact of Pensacola and Baldwin County Humidity
Living near the water in Pensacola or Baldwin County presents unique challenges for garage door electronics. In areas like Gulf Breeze and Navarre, salt spray and high humidity create a stubborn, corrosive film on the sensor lenses that regular wiping won't fix. This corrosion often starts at the wire entry point on the back of the sensor housing, where the salt air can reach the copper connections and internal boards. Coastal sensors often fail 20% faster than inland units. This environmental wear and tear can cause the internal circuit to degrade silently until the system stops working entirely.
Safety Risks of Bypassing Sensors
Never permanently bypass or "jump" your safety sensors to solve a closing issue. It might be tempting to wire the sensors together at the motor head just to get the door moving, but this is a dangerous gamble. Bypassing these sensors creates a massive liability and a significant physical hazard for your family, pets, and vehicles. The system is there to prevent a heavy steel door from becoming a weapon. If your sensors are dead, a professional LiftMaster garage door opener service is the only safe path forward. If you've reached the end of your DIY options, contact our team for a professional diagnostic to ensure your home remains secure and your system operates at peak safety standards.
Professional Support for LiftMaster Systems in the Gulf Coast
DIY efforts go a long way, but some electrical faults are buried deep within the system's logic board or hidden behind complex wiring runs. If you've reached the end of your LiftMaster safety sensor troubleshooting steps without success, it's time to bring in a team that understands these systems inside and out. RTS All American Garage Doors operates with a commitment to integrity and transparency. We don't use vague estimates or hidden surcharges. Instead, we provide standardized pricing so you know exactly what to expect before we even arrive at your driveway. This honest approach is our verbal handshake with the community.
Our service area covers the heart of the Gulf Coast, including Pensacola, Gulf Breeze, Navarre, Pensacola Beach, and Baldwin County. When you call us, you won't be routed to a faceless call center in another state. You'll speak with a local professional who understands the urgency of a garage door that won't close. We have extensive expertise in both residential and commercial LiftMaster systems, ensuring your home or business stays secure and your safety mechanisms remain fully compliant with federal standards.
Why Choose a Local Technical Expert?
Living on the coast means dealing with unique environmental stressors that inland technicians rarely encounter. We understand how salt air and specific wind-load requirements in Florida and Alabama affect the longevity of your hardware and sensors. Our service trucks are fully stocked with genuine LiftMaster and Wayne Dalton parts, allowing us to perform most repairs on the spot. Because a stuck garage door is a major security risk, same-day service is often available to address urgent safety sensor failures or opener malfunctions. We treat every residential system with the care and discipline it deserves.
Comprehensive Maintenance and Safety Checks
A sensor malfunction is often a sign of underlying issues with your entire garage door system. If your sensors are failing due to excessive vibration or track misalignment, it's the perfect time for a full garage door tune-up service in Pensacola. We do more than just swap parts; we perform a top-to-bottom safety check. This includes inspecting your torsion springs, cables, and rollers to ensure your door operates smoothly and doesn't put unnecessary strain on your LiftMaster opener. Don't leave your home's security to chance. Contact RTS All American Garage Doors today for a professional safety diagnostic and get your system back to peak performance with the reliability you expect from a local expert.
Restore Your Home's Safety and Security
Mastering the basics of LiftMaster safety sensor troubleshooting empowers you to handle common issues like lens obstructions and simple misalignments. Understanding those 10-flash blink codes and keeping your sensors clean from coastal salt air are the first steps toward a functional garage. While many problems are solved with a microfiber cloth or a quick bracket adjustment, persistent wiring faults and corroded circuit boards require a more technical touch to ensure your family's safety remains uncompromised.
Our team brings over 15 years of local expertise to every residential repair. When you call us, you'll speak with live local technicians who know exactly how to handle our regional climate. We believe in complete transparency, offering standardized pricing with no hidden fees to ensure you feel confident in the value we provide. Schedule your professional LiftMaster sensor repair with RTS All American Garage Doors today! We are ready to get your door moving safely and reliably once again.
Frequently Asked Questions
Why is my LiftMaster garage door opener light blinking 10 times?
The 10-flash signal means your sensors are blocked or the beam is broken. This is a safety feature of the Protector System that prevents the door from closing on an object. Check for physical obstructions like a trash can or a broom in the path. If the path is clear, your next step is to verify the alignment of the sensor eyes.
Can I clean garage door sensors with Windex or water?
You should use a clean, dry microfiber cloth to wipe the lenses. Avoid using Windex or other harsh glass cleaners because the chemicals can degrade the plastic lens over time or leave a filmy residue that scatters the infrared beam. If the lens is particularly dirty, a tiny amount of water on the cloth is sufficient to clear the debris.
How do I know if my garage door sensor is bad or just unaligned?
Look at the LED indicators on the side of each unit. If the green light is flickering or completely dark while the amber light is solid, you are likely dealing with a simple alignment issue. If both lights are off, you likely have a wiring fault. If the lights are solid but the door still reverses, it's time for deeper LiftMaster safety sensor troubleshooting to check the logic board.
Do both lights on garage door sensors have to be green for LiftMaster?
LiftMaster systems use one amber light and one green light. The amber light is the "Sending Eye" and should always be lit if it has power. The green light is the "Receiving Eye" and only glows solid when it sees the beam from the other side. Both lights must be solid and steady for the opener to allow the door to close safely.
Will sunlight really stop my garage door from closing?
Direct sunlight can definitely interfere with your garage door's operation. The sun emits powerful infrared radiation that can overwhelm the receiving eye, making it think the beam is blocked. This usually happens during the morning or evening when the sun is at a low angle. Swapping the sensor positions or adding a small sun shield can fix this environmental problem.
Is it possible to align garage door sensors by myself?
Aligning the sensors is a task most homeowners can handle in under ten minutes. You only need to loosen the wing nut on the bracket to pivot the sensor until the LED stops flickering. Once the light stays solid, tighten the nut by hand. This simple adjustment is a core part of LiftMaster safety sensor troubleshooting and saves you from a service call fee.
What should I do if the wires to my sensors are cut?
You can repair a cut wire by stripping back the insulation and twisting the matching colored wires together. Secure the connection with wire nuts or high-quality electrical tape to prevent shorts. However, if the wire is badly frayed or chewed by pests, replacing the entire length of bell wire is the most reliable way to ensure your safety system doesn't fail again.
How much does it cost to replace LiftMaster safety sensors?
The total cost depends on whether you buy the parts yourself or hire a professional technician. A professional service includes the cost of genuine LiftMaster parts plus the labor for installation, alignment, and a full system safety test. While DIY kits are available, a professional ensures the wiring is secure and the system meets all current federal safety standards.